12.05.2007

Snow White and the 2 Stop Overexposure

This past weekend we had our first big snow fall, got some more last night and they're predicting more for this week. So, it only seems appropriate that I post something here about shooting snow. Snow is very bright and many of us have a hard time capturing that quality in our snow images. They usually come out gray and muddy. So, for my benefit, I'll talk through the problem and consequently give you something to chew on the next time you're shooting snow.
First Snow
Here's the deal ... the problem is your camera's exposure meter. Especially, if you're using 3D Matrix metering, or even center-weighted metering. The meter looks at the scene and calculates an "average" value to use to expose the image. In other words, the meter looks at the really dark areas, the really bright areas and all the values in between and comes up with an average that we trust will expose the image properly. Unfortunately, the image doesn't workout that way.

Just for the record the "average" that I'm talking about is technically known as 18% gray. Essentially, black is black (0%) and white is white (36%) meaning that photographic black reflects 0% of the light shining on it and photographic white reflects 36% of the light shining on it. The camera's meter takes all that into account and returns an exposure value base on the 18% benchmark ... or average.
First Snow
This works great for a scene with 50% dark values and 50% light values. The problem arises when you shoot a snowy scene because usually much more than 50% of the scene is reflecting 36% light or photographic white. So, consequently the exposure meter suggests a value that is one or two stops too low or underexposed turning that beautiful white snow to a muddy gray. Bummer.

There are a few different approaches you can take to counteract the camera's proclivities to underexpose snow and luckily they're all pretty simple.

First off ... using 18% gray as our benchmark if I underexpose an image by four stops I can achieve photographic black. On the other hand if I overexpose by two stops I can achieve photographic white. Give it a try. After all, you're shooting digital now and you won't be wasting any resources. See what you come up with.

So, for the first trick ... you can assume that you need to overexpose by 2 stops to achieve photographic white. Working in manual exposure mode it's easy enough to crank your exposure open 2 stops on every shot. If you're using one of the auto modes (Aperture, Shutter, Program) you can set an exposure compensation value of +2. Using the program modes you may have a setting for shooting in snow (sometimes indicated with a snowman\sun icon) or you can select one of the other program modes and leave your exposure compensation value at +2. This is the best solution when shooting with a modern, compact point and shoot camera ... set your exposure compensation to at least +1 but no more than +2.

The trick that I like is set the D70/70s to manual mode. Set the aperture you want for your subject ... perhaps f/8 and then point your D70/70s to the sky. While looking at the sky, set the shutter speed so the exposure is correct ... not underexposed and not overexposed. Then, shoot away at the subject. Once you point your camera back at the subject you'll notice in the viewfinder that the exposure meter is overexposing the scene somewhere between 2/3 stops and 2 stops. The nice thing is the exposure seems to be more accommodating to the overall scene. Metering off the sky tends to give you a more precise exposure based on the light that's reaching the subject versus the light that is reflecting off the subject.

If you have the time to take you can use a gray card and set your meter to the light that is reflecting off the gray card subject. Test the difference between using a gray card and using the sky. They're real close! And since a gray card isn't always at hand using the sky is a great convenience!
Bailey in Snow
This one of Bailey I purposefully overexposed by more than 2 stops so that she just faded into the white surroundings. At least that demonstrates the control you have and it's fun playing around with principles of physics ... isn't it?

Hope this helps! Thanks for reading.

i shoot nikon

11.28.2007

Yeah Mom, it's a Nikkor ... uh huh ... 50mm f/1.4

I got a new lens. Well ... new to me anyway. I found a very slightly used Nikon 50mm f/1.4 prime at a local camera store at a very, more than slightly reasonable price! I haven't shot with a prime lens for a long time and had forgotten about the magnificent things that can be done with a fast lens.
deke
I'm used to shooting with lenses that range in maximum aperture from f/3.5 to f/4.5. I guess once you're used to that the maximum aperture becomes pretty innocuous. So, it can be quite shocking to first discover that what would have been shot using say f/3.5 @ 1/30 can now be shot at f/1.4 @ 1/125 is a startling difference! Now you start thinking you may have been bitten by a radio-active spider. I told you it's been a long time since I shot with a fast, prime lens. At first, you really need to watch your focus and DOF to make sure you're getting what you want. Probably, one of the nicer things about this lens is that on a digital camera the angle of view is slightly more acute giving you a 75mm f/1.4 portrait lens. This is very cool and well worth the expense. Not only that but, it focuses as close as 1.5 feet away which is pretty close and may someday qualify as a pseudo-macro. It's close anyway and nice bokeh!

Anyway ... I'm excited to add this lens to my modest arsenal and look forward to using it a lot.

i shoot nikon

11.15.2007

Lightroom ... an exposé

Starting with a disclaimer is usually a sign of ill will. But, I assure you that's not my intent. Anyway ...


"This is not a review, this is not a promotion, this is not a sales pitch. This is a posting that simply tells you ... the reader ... about the experience I've had using Adobe Photoshop Lightroom".

There. I've said it. Now, let's move on.

First off, it's important to know that I made the decision to shoot digital so I need to manage my own image files versus a bunch of envelops with 4 x 6 prints. I also made the decision to shoot RAW (NEF in Nikon parlance) so, I need to do my own post processing. Alternatively, I could have the camera produce JPG's essentially doing the image processing in the camera and use a management tool like Nikon Picture Project or the like.

I've been using Lightroom for about a year. Last October I downloaded the beta version and contributed a little bit to it's development (actually, I might have posted a couple of responses on the development forum). It was exciting to see it change and evolve into a final product that was officially released February 2007.
Prior to downloading Lightroom, I had spent a lot of time with Photoshop. In fact, I had been using Photoshop since 5.0 and loved the stuff I could do with it, especially as a web developer.

When I made the leap to digital photography however, Photoshop became a huge drag to use. Not because of what it could do for an image but, because of what it couldn't do for many images as far as I was concerned. All of a sudden I needed Adobe Raw Converter (ARC) and Bridge (whatever that is) and an NEF plugin and all sorts of crap! Nikon View and Picture Project were closer to what I needed and yet seemed completely unconnected to the processes available in Photoshop. So, Lightroom encompassed all those needs and packaged them in one very powerful application. Adobe marketed Lightroom as "for photographers by photographers" so I bit hook, line and sinker.

I guess the nicest thing about an application like Lightroom (and it's competitors: Bibble, Aperture, and the like) was here is the "whole process" all lined up and ordered, ready to go. All I had to do was follow the formula and I was rockin'.

Importing & Library Management


The process that I use to get images into Lightroom's management system is first to create a folder for my images on the hard drive I use to store images. The folder name is today's date followed by a short, one or two word description. Like this: "20071112.Location.subject". That way the folders on the hard drive can be sorted into chronological order and are easy to keep track of when I copy them to a backup DVD.

Then, I move the original images from my compact flash card using a card reader to the new folder. Once I open Lightroom I can import the images from that folder to the Lightroom Library leaving the origs in the folder and just referencing them from the Library to the folder. This is a great feature.

Alternatively, I could set up a hard drive destination in Lightroom and import the images from my card to a sub-folder in that destination. Either way, Lightroom allows me to manage the original files, moving them, deleting them, etc.

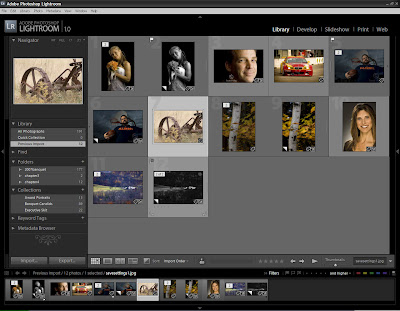
Once Lightroom knows about your images there's a lot of work you can do to manage them. Images can be flagged "pick" or "reject." Then you can delete your rejects (from just Lightroom or from your hard drive). You can rate each image 1 through 5 stars. You can categorize them using color (red, yellow, green, blue, purple).

Here are the steps I use after importing each shoot:

  1. Go through and flag rejects (obviously can't or won't use)

  2. Delete rejects from hard drive

  3. Go through and flag "picks" for further processing

  4. Categorize the "picks" with color for needed processing (ex. red = red-eye, yellow = cropping, green = general processing, etc.)

  5. Add keywords

  6. After processing ... rate each image

Now, adding keywords to an image or many images can actually be done about anytime while you're in the Library view. Keywords are a lot of work. But, they are worth every minute you spend on them. Later you can very easily recall images based on keywords ... "give me all the images of flowers that are yellow with my dog Bailey." One or two clicks and you got 'em!

There are many other features of the Library but for now, they're beyond the scope of this post.

Darkroom -- Post Processing

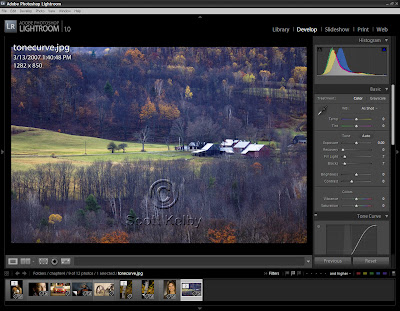
In Lightroom this is the Develop module. You essentially work on one image at a time but then you can do one of two things: select another image and click "Previous" will apply all the last edits you did to the currently selected image or you can select multiple images including the original that was edited and click "Sync" which will apply all the last edits to all the selected images.

Here's what I do ... Lightroom has a navigation panel that runs along the bottom of the screen. Since I have already flagged my "picks", I set the filter to just display the picks. Then, I move to the Develop module and work on each pick individually. The only exception to that is if the images are so similar that a previous edit can be applied to multiple images as described above.

Generally, I follow the Develop module Basic tools making adjustments where necessary from top down. White balance ok? Skip that adjustment and move on to the next or adjust temperature or tint as needed. Move on to Exposure ... etc.

In most cases I do the following:
  • Adjust Exposure
  • Work on the tone curve
  • Adjust clarity, vibrance and saturation
In a number of cases I will crop the image prior to adjustments but, can actually crop anytime. If necessary, I can straighten the image, do spot touch-ups maybe later add vignetting. If I ever reach the limit of Lightroom's capabilities I can edit a copy of the image in Photoshop. The copy will be automatically included in the Lightroom Library right next to the original.

If I ever need two versions of an image, perhaps with different edits or effects applied, I can right-click any image and select Virtual Copy. That will make a second version of the original image with the applied edits that can be further altered and later be stacked with the original.

The best thing about the Develop Module or process is that Lightroom never alters the original file. It only applies the edits I make in the various views of the image.

Exporting Images for Publication

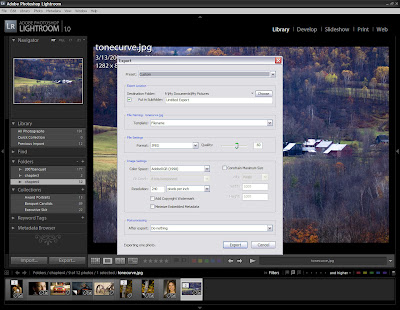
This is the part I like ... after you have finished developing your images, you can return to the Library Module, filter and select the images you want to work with and click on Export. Exporting the images is a routine that allows you to identify where you want to export to, devise a file naming pattern with sequence numbers, select a JPG quality level and a maximum dimension and resolution for the exported images. Once the images are exported you can take/send them to your favorite photo processing to get prints made, print them yourself, or upload to your favorite Flickr account or other internet gallery. It's very simple and fast!

At this point ... Lightroom has fulfilled my current needs and I look forward to taking more advantage of its capabilities to manage and publish client work. There are three more modules in the Lightroom arsenal Slideshow, Print and Web. These also make publishing a breeze. The Slideshow module lets you compose a slide show of selected images and save it as a PDF file to be distributed any way you like. Print helps you transform your images to prints on your own photo printer and the Web module produces the HTML files you need to publish a gallery or slide show to your website. Very cool stuff!

Resources for the curious

Hopefully this helps somebody get started with an imaging workflow. Because, that's what's needed. There are a number of tools out there that can help you as well as some logical techniques you can certainly employ yourself without all the folderol of learning another computer application. None-the-less, workflow can be daunting when you first realize that you have a mess! Just look at that big box under the bed with all those envelopes of 4x6 prints you've been meaning to put in albums since you graduated from college ... or since you got married ... or since you had kids ... or since you retired ... since you're here at your funeral service.

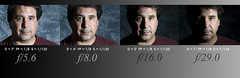
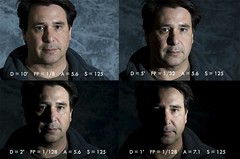
By the way ... the images in this post are screen shots I captured while working through Scott Kelby's Adobe Photoshop Lightroom Book for Digital Photographers. A resource worth looking into. Thanks Mr. Kelby!

i shoot nikon

11.14.2007

Celebrating Our One Year Anniversary

nikonD70sI have now been shooting with my D70s for one year. It is only fitting that I take a moment and celebrate this occasion. I promise I won't sing but, I can't dismiss the possibility of other inane pursuits. As a recap of the last 365 days regarding my venture into digital photography I've compiled the following list of things I've learned.


  • Since I can create images on a whim, I do. This means that I have many more images and need some way to manage them, organize, tag, and access. Thank god I have Lightroom [or insert your own preference].

  • I am the one in control of image destiny. There are no more fast photo processing places to correct exposure, red-eye, colors, etc. Thank god I have Lightroom [or insert your own preference].

  • I was reflecting this morning that I still have a hard time conforming to a pre-shoot routine. I have the "what-equipment-will-I-need" part down very well. What I keep forgetting to do is set ISO and white-balance (all questions that were answered pre-digital by the type of film I bought).

  • I love the fact that I can experiment; capture an image, learn from it, and try it again until I have it right without waiting for processing.

  • What comes easy to me does not come easy to my parents who also have a digital camera and want desperately for it to be as easy as shooting film. Note: Kodak's motto has always been, "You Press The Button and We Do The Rest."

  • I had shot with digital point-and-shoots prior to my D70s and missed plenty of moments because of the camera ... shutter lag. Now if I miss a moment it's a problem with my own abilities to anticipate.

  • I've shot Nikon since I bought my first Nikkormat when I graduated from high school ... Nikon still rocks!


As far as the D70s itself goes ... it has been the exact camera that I needed to get started in digital photography. Since I purchased the D70s I have added an SB-600 Speedlight, an SB-800 Speedlight, an SU-800 Speedlight controller, the Nikkor 18-70mm DX AF-S, and a Tokina AF 12-24mm f/4 AT-X 124.

The only drawback I've had with the camera is the size of the LCD screen. A friend of mine just got a D40 and I definitely have LCD envy. Actually, I could probably get a new pair of glasses and the situation would be much improved. Although, that still wouldn't assuage my desires to upgrade my D70s to another fine Nikon. I contemplated a D80 when I was first in the market for a DSLR. But it was too expensive at the time. I've thought about a D200 and Nikon has started its rebate on that camera to clear out inventory since the release of the D300. I think I'll hold out until the D90 comes out. I don't know if they're actually devising one but, it makes sense that that could be a next step.

Until then, I love the D70s. It's a great camera and with the other gear I have it makes sense to hold on to it and keep doing what I'm doing. So, here's to next year! As this past year has been great!

i shoot nikon

11.13.2007

Using Balanced Flash Fill

A couple of weeks ago I was back home for a few days and had the opportunity to shoot at a well populated skate park. Both days were really nice days so there was a lot of activity and the boarders were in the mood to show off.

The first day I showed up without a flash ... that is without anything beyond the on-board flash. The sun was low, being in the late afternoon so, shadows were kind of a problem with the sun coming through a lot of trees. Nice gobo effects however, unwanted. You can see by the results that faces are hidden or obscured with shadow and the contrast is a little over the top.

SkateBoarding 6

SkateBoarding 5

Shooting Information: Shutter Priority/ISO 320/Center Weighted/22mm f/6.3 @ 1/1000


On the second day under very similar conditions, I mounted the camera with my SB-800, set it for TTL BL and here are the following results. You can see how the shadows were lifted and the subjects were much more evenly lit. I think the results were much better.

SkateBoarding 2

SkateBoarding 3

Shooting Information: Aperture Priority/ISO 200/Center Weighted/40mm f/9 @ 1/320


I got some nice shots of the boarders that day but regret not having my flash on the first day. I also wish that I would have spent more time playing with the flash instead of setting it in TTL BL mode and just leaving it. It would have been nice to sync a lower speeds to capture some more of the motion. Well ... next time.

I did happen to get this shot that I like quit a bit. I'm not sure why ... maybe its the anticipation. Not sure.

drop in

i shoot nikon

10.07.2007

Panning the Marathon

I was at the Twin Cities Marathon today with a bunch of family ... in fact, we tailed my brother-in-law along the whole course. We met him at the first five-mile marker and every subsequent five miles after that. It's a fun little hopping game with a bunch of family in the van squeezing through the narrow double-parked streets of south Minneapolis. It was a beautiful day ... hot, and we had a great time.

I spent the day with my D70s and the 18-70mm kit lens. I really like this lens. I think it's almost an insult to call it a kit lens. This lens is very sharp, focuses fast, is light weight and looks cool, too.

Besides the obligatory pictures of the pit crew goofing around, I had the opportunity to try some panning with my camera and show some motion with the subject. I was shooting in aperture priority so I kept the f/stop high around f/22. This meant that the shutter was hovering around 1/15th to 1/30th of a second using ISO 200. I kept the focal length of the zoom at about 50mm. That gave me nice distance between me and the subject as I panned perpendicular to the street.

Here are some of the results ...
0710_mpls.marathon_002
0710_mpls.marathon_003
0710_mpls.marathon_001


In the next couple of months I'd like to touch base on Adobe Photoshop Lightroom. I've been using it for almost a year now and have some things to say about how it has helped me. I'd like to find out what is hootnik on readers are using. Let me know. I'm not interested in starting big arguments just gather information and see what people think. Thanks all.


i shoot nikon

9.20.2007

Custom Settings and other things D70

Speaking of custom settings on the D70 & D70s, a friend of mine and I sat down with our cameras this weekend and I introduced him to the many custom settings and some of the logic behind them. Some of the settings are pretty obvious ... turn that damn beeping off! Other settings need some insight and explanation.

Now, I'll spare you the dissertation here and just give you a "heads-up" on PlanetNeil. Photographer Neil van Niekerk publishes this great blog on his work. And he happens to have a spec sheet that describes all the D70/s custom settings, how he uses them and why.

It's a great little resource and saves me from having to type all that stuff out. Here's the link to Neil's custom settings page: D70 Custom Settings. And another link to Neil's great content: Nikon D70 wireless TTL flash.

Thanks Neil ... hope you don't mind.

i shoot nikon

9.18.2007

Hotdish and the Heisman Trophy

Let's see ... thirty days has September, April, June and November ... what the hell happened to August!?! It was just here a minute ago! Man, I can't believe that September is here already and I still haven't deflated my pool toys yet. I'm two assignments down for Strobist Lighting102 and my schedule just keeps getting busier.

I'm sorry about that because I'm noticing a little more traffic here at is hootnik on and I need to accommodate even a modicum of interest with new content. I've actually had a lot to say but it's incomplete. For now, let me take you on a little adventure we like to call the "Great Minnesota Get Together."

That's right ... you missed it! The Minnesota State Fair. It's a beautiful event. Spiritual in every way that is only Minnesotan. In brief, a state fair is a gathering of folks that want to show off their wares, which in turn gathers more folks that need to eat and spend money ... or at least sign up for stuff. That is the fundamental spirit of this event. It lasts 12 days (through Labor Day) and you can see everything from a new calf being born to the Heisman Trophy. Back in 1941, Bruce Smith won the Heisman playing football for the University of Minnesota Golden Gophers.

Eating is a fundamental joy that, at the State Fair, only slightly transcends the primitive ritual from which it stems. Example ... the ridiculous manner by which it's accomplished ... that is, on a stick. It's very popular, almost requisite, to find something, preferably edible, put it on a stick, and sell it to people that have little if any manners. And the more creative the better. We're talking deep-fried candy bars and Hostess Twinkies, alligator, pork chops, all varieties of kabobs, stuff you can't pronounce, nor would you show to the kids.
Hotdish on a stick
Now it's important to understand that Minnesota is Scandahoovian country. A conglomeration of Northern European ancestry that, mixed with a conservative Lutheran backbone, comes out green Jello and hot dish. Hot dish is the common vernacular for "casserole." However, in its tradition, it has been elevated to the high art combination of ground beef, tater tots and cream-o-mushroom soup. For the record, Ole and Lena make a kabob alternating tater tots with meatballs, batter that bad boy, deep fry it and serve it with a generous side of aforementioned soup. Mmm mmm good!

But that's not all! Visiting dignitaries often border on the impossible. Remember Jesse Ventura, who wouldn't leave Minnesota, and Senator Norm Coleman who couldn't win anywhere else? Santa in AugustWell, Santa comes here in August. I'm not sure why ... walleye and musky fishing won't pick up again until late September, camping is crippled with minnesquitoes and picnics can't escape the wasps. He must own a jet ski. Either that or Jimmy Jam's manse on Minnetonka has gone time share. Never-the-less, it makes the state fair an interesting place to hang out for the day.

Photographically, I had a hard time at the fair this year. I continued with my experiment working with center-weighted metering instead of 3D Matrix. I found overall that my images came out a little muddy, under-exposed even though highlights were blowing out. Lot's of sun is very difficult to shoot in. Most of the images I captured had to be on the run because I was there with family and that was really the purpose of the excursion. So, I feel lucky to have gotten anything. I shot in auto-aperture mode with my ISO set to 400. Even with all the bright sunshine I literally had to point and shoot relying a lot on the camera.

I was able to get this shot of the cowboys up on Heritage Hill and particularly enjoy the composition. The three white hats, the leisurely postures. Then I'd get a cup of coffee and give my foot a push. Just me and the pygmy pony over by the dental floss bush (Thanks FZ).Cowboys

I always wanted to be a cowboy when I was a little kid but now I can't imagine living that ... even in the comfort of a heated, well-lit barn; a mud room with plenty of space to hang my hats and a basketball hoop along side the driveway. I think I'd be far too conscientious wearing a hat like that in the hood.

Still, it's one of my favorite shots from the day in that its authenticity is very human albeit contrasted with its contemporary surroundings and a bright red styro-foam cup.

Finally, I just want to point out the old adage ... "there's a comedian in every crowd". Here's the proof. Al Franken for Senator.
Minnesota Politics
Vice-president New Guy: "The senate recognizes the distinguished Senator from Minnesota, Democrat Al Franken! ... who will be selling DVD's of his campaign out in the lobby after today's session."

Shine the light, Al. Shine the light.

i shoot nikon

8.12.2007

Strobist: Cooking Light Assignment

Okay ... so take what you've learned and apply it. Why is it so easy to forget?

The Assignment: ... photograph one or more kitchen utensils - knives, forks, spoons, whisks - whatever you like. The look you are going [f]or is that of ordinary object elevated to high art. Or at least commercial art, as this is the kind of thing that might appear as a catalog cover or in a calendar or on the wall of one of those ubiquitous "fast casual" restaurants.


The first piece of advice was something I unconsciously ignored: keep it simple.

I'm not sure why I started by over-thinking but I did. There always seems to be at least two ways to accomplish just about everything. Sometimes I start with sketching, formulate some image. Have a plan. Work loose and noodle until it's clear. Or because of computers, we tend to work tight, manipulate tight imagery into an even tighter image often times forcing the issue and achieving no real expression.

My first attempt is the perfect example of working too tight and forcing the issue. Here ... take a look and I'll explain. L102: CookingLight Final See Setup Here

This is a pretty nice image but really says very little of the assignment. I didn't plan or even noodle around awhile. I found this interesting shape with this vegetable brush and some pretty rocks. Completely unrelated unless I'm using the brush at the end of a fly-rod. That's not to say that the combination isn't workable, just not in this context. And the result says I took some stuff and lit it with some stuff that I've been trying to find more uses for. It was a lazy, inexpressive attempt.

Well ... at least it was late enough that it garnered little attention.

Version 2 is a nicer image. It is simple, direct, and actually uses the principles that I learned in the first two exercises from Lighting 102. Here ... take a look. Strobist: CookingLight V2.1Strobist: CookingLight V2.2 This is a much nicer image. In fact, so much better that I did two versions of it. The two are virtually the same except for the material that was used to diffuse the light. In the first one I was using a PhotoFlex Light Disc and in the second I found and used this huge roll of white paper (almost as heavy a butcher paper without the coating on one side). The only change I had to make between the two materials was to increase the output of the flash from 1/32 power to 1/8th.

The second image seems to hold a little more detail. The light is still hot on the "MicroPlane" text yet seems smoother in the second image. See Setup here.

i shoot nikon

8.03.2007

Copyright

Copyright 2009© by is hootnik on. All rights reserved.

Individual articles in this journal are copyrighted, as indicated in the page footer.

Individual articles may be downloaded for personal use; users are forbidden to reproduce, republish, redistribute, or resell any materials from this journal in either machine-readable form or any other form without permission of is hootnik on or payment of the appropriate royalty for reuse.

For permissions and other copyright-related questions, please email your question to: mcdekovic@gmail.com

7.13.2007

Whatever happened to Bobby Sherman?

I was in Seattle earlier this week attending a web design conference with about 400 other geeks from all over the place. Web Design World was held at the Marriot on the waterfront.

I had never been to Seattle. I had never been to a web design conference. Both were extraordinary. The only thing awry was the weather. It didn't rain! Not one drop. In fact, I had checked the weather forecast prior to my arrival. It was to be sunny and in the 70's while back home it was going to be sunny, hot and in the 90's. What actually happened ... sunny and 70's back home, sunny and hot in Seattle!

My day's were pretty much filled with conference but, I woke up early and took some shots, shot a sunset from the pier of the Seattle Aquarium on Monday night and took a couple of hours from the conference on Tuesday afternoon.
seattle-23
I just took my camera with my trusty 18-70mm f/3-4.5. This was a great lens to walk with. It's fast, sharp (I tried to keep the aperture around f/8.0) and light weight. I walked up toward the Space Needle ... did you know that thing was built in 1962. It's amazing that it's been around that long.

I got some great shots along the way and around the Space Needle. The one on the left was taken when the sun was really high in the ski. You can see it casting an eclipse effect, halo around the capsule.

Just under the Space Needle nested in the landscape I met Earl. Well, I call him Earl because I forgot to ask him his name.
seattle-24
Anyway, I had snapped a quick shot of Earl and thanked him by throwing a buck into the colander he was using to hold his street money. We got to chatting and he asked where I was from and what I was doing in Seattle. I told him I was here for a web design conference expecting the conversation to be over quickly. Not so, oh Stop Bath breath!

Earl proceeded to inform me that he was a Photoshop expert, had been working with Photoshop since its inception and launched into a lesson about the Photoshop interface instructing me on the exciting use of layers and the different blending modes. He was great.
seattle-28
I wandered down 5th Avenue to the retail district catching this shot of a kid passing out flyers in support of the LaRouche Political Action Committee whatever that is. It was just a good photo opp.

It was about here where I turned back toward the waterfront and ended up at the Public Market Center ... that famous farmers market ... where they throw the fish back and forth. A couple of times I thought I saw Bobby Sherman. I needed a Starbucks.
seattle-29
One of the things I worked on today was purposely stay away from 3D Matrix metering and use center-weighted. I found that, in the light of midday sun, I was able to get the exposure I wanted more accurately. I kept the camera in Aperture Priority (A) mode and ISO 200 for the whole walk although I raised the ISO to 400 and popped the on-board flash when I got inside the market.

More images Seattle set on Flickr.

i shoot nikon

7.09.2007

1.2 Distance - Again ...

I promised ... or at least alluded that I would redo my attempt at the second lesson concerning distance in my last post. This has been a good exercise and revealed a lot answers that have been plaguing my previous, aimless attempts at lighting.

Working with a single light is particularly eye-opening in that there is so much to realize about the possibilities. Distance, angle, intensity, texture, shape, definition ... all of which are critical to the decisions you make about your subject and photographing it or them. It points the possibilities as you add more light, reflect light, intensify light, etc.

In this, my second attempt I stuck strictly to the formula described in the assignment and worked with only two changing variables: distance and aperture. Here's the result:View Larger

So ... all I did was move the light closer to the subject and as the intensity of the light increased I stopped down the aperture to compensate for the extra light reflecting back from the subject. In that way the apparent light being reflected from the background decreased finally turning the background to a rich black.

Now I can determine how much of the background is needed for the image and know how to control that effect. That's very cool. I'm assuming that as more lights are added that making these decisions, although more complex will be easier to layer into place.

i shoot nikon

7.02.2007

Lighting102 - Lesson 1.2 Distance

Hmmm ... light has DOF (depth of field) ... sort of. I had to think about this one and mess around with the assignment set up before I started to get it.

So the objective of this exercise was to demonstrate that light has DOF and with enough light, you can turn any white wall background black. After playing with this exercise I think another way of looking at it is to consider that we are controlling the pace at which light "falls off" beyond our subject. And using that as a design choice or tool set to control our compositions.

Setting Summary


Camera: Mode @ Manual, Shutter @ 1/125th, Aperture @ f/5.6.
SB-800: Mode @ Remote, Channel 3, Group A, Zoom @ 50mm
SU-800: Mode @ Remote (not Macro), Group A set to 1/8 power on Channel 3

What I kept constant throughout the exercise was the shutter speed and the angle for the light to the subject. Otherwise distance from subject, flash output power changed. Aperture changed on the last image because I ran out of lower output settings on the flash. I tried to match the previous exposure by reducing the flash output only as I moved the flash closer to the subject.

Result

assign2comp
D = distance, FP = flash power, A = aperture, S = shutter

Theoretically, it makes sense to me that what we're simulating is moving the background farther away from the subject. The distance between the subject and the light source remains the same throughout. The light power level and exposure settings remain the same. Only the distance between the background and the subject change.

However, since it can be infinitely more difficult to move the background (unless of course, you're Flo Zigfield or the like) we simulate the same principle: decrease the amount of light therefore darkening the background; decrease the distance from the light to the subject which increases the intensity of light on the subject but, produces more rapid falloff past the subject.

I think I'll do this exercise again only leave the power level of the light source the same and adjust only the aperture to accommodate the increased intensity on the subject as the light becomes closer. I'll let you know how it turns out.

i shoot nikon

7.01.2007

Lighting102 - Lesson 1.1 Position

Well ... I finally got some time to get started on Strobist Lighting Bootcamp - Lighting 102. The first assignment was to take a series of photographs with a single off-camera strobe, keep it the same distance from the subject but, change its angle to the subject.

I kept my study pretty simple. The flash was positioned over the top of the camera at a direct angle to the subject, moved 45 degrees to the right and again to 90 degrees or full side.

As for the equipment - I used my D70s with an 18-70mm zoom. I mounted a Nikon SU-800 on the camera. This is a great piece of equipment that acts as a remote commander for up to three groups of flashes on three different channels.

I put my SB-800 Speedlight on a lightstand and raised the stand so that the flash head was at about the same level as the camera lens. The light was kept about 4 - 5 feet from the subject and the subject was about 5 feet from the background.

Setting Summary


Camera: Mode @ Manual, Shutter @ 1/60th, Aperture @ f/5.6 (that was about 2 stops shy of a correct ambient light exposure of which there wasn't much).
SB-800: Mode @ Remote, Channel 3, Group A, Zoom @ 70mm
SU-800: Mode @ Remote (not Macro), Group A set to 1/64 power on Channel 3

The Results


assign1comp

I put together this composite shot to closely compare the changing light positions. I'm glad that I kept the flash head at the same height as the camera lens because the result is quite dramatic.

What struck me about the differences in the light position is look closely at the left side of my face. All of a sudden there is detail given to even the smallest variation in texture. The definition given to the shape of the face is quite dramatic as well. There's character that didn't exist in the shot with front light!

Looking at the 90 degree shot shows even more defined qualities. And drama! Movie poster stuff! Now, I'm not too sure I'd use this exact technique for a senior portrait but, being able of adding just a little drama to an otherwise dull teenage condition might prove useful and profitable.

i shoot nikon

6.18.2007

Strobist Style with a Nikon D70s

Before I start in earnest to work on Lighting 102 at Strobist I thought it would be a wise idea to review the various flash settings of the Nikon D70s for off-camera flash. Essentially, there are two ways off-camera flash can be controlled by the D70. Either wirelessly or tethered with PC cables and the like. Since one of the two flashes I have does not sport a PC connection nor do I want to spend extra time or cash to accommodate a PC connection, we'll talk only about wireless.
nikonD70s

What is Custom Setting 19?

This is the heart of the matter. You won't even see it unless you go to the Setup Menu (little icon that looks like a wrench) and select option 4 (CSM menu). There are two choices: Simple and Detailed. Select Detailed. This will give the Custom Settings menu (little icon that looks like a pencil) 16 additional settings to control. Oh boy! More stuff! It's like Christmas!

In the Custom Settings menu, option 19 Flash Mode, you have three choices ... TTL (Through The Lens) surrendering control to the camera and its exposure meter; Manual which sets the output level for the built-in speed light; and Commander Mode ... here's the sap in the tree! Commander Mode allows you to use the D70s' built-in speedlight to trigger remote flash units like the SB800 and/or the SB600. It is here we want to look further.

Commander Mode also has its own three options ... TTL: again surrendering control to the camera and its exposure meter; AA: (Auto Aperture, available only when CPU lens is used with SB-800), forget about it for right now ... that setting is still surrendering part of the exposure control to the camera; and M: (Manual Mode ... ooohh, aahhh) that's what I'm talkin' 'bout! Manual mode allows you to set the output level of your wireless, off-camera flashes from full power to 1/128th power. This is where we'll be working.

Now ... it's important to note that in wireless communication, perhaps we're talking about your laptop to a wireless router or your cordless phone, there are "channels" of communication. Literally, you set your device to a particular channel to communicate with another device or perhaps this one or both devices do this automatically. The Nikon D70s has no choices. It is permanently committed to communicate on Channel 3 ... whatever that means. You can't change it. There's no Custom Setting 26 or Commander Mode/Manual/Channel setting.

Let's move on ...

We should now have custom setting 19 Flash Mode set to Commander with Commander menu set to M (Manual) ... at this point you can choose any power output level say ... 1/16th power.

Now ... let's look at adding a flash unit to the mix. Keeping this simple for the time being, we'll look at an SB600. On the flash unit hold down the Zoom and the minus(-) sign together for 3 seconds or so to enter the Custom Settings menu for the flash unit. Press Mode until the the wireless symbol appears and press either the plus (+) or the minus (-) sign until the unit says "On." Hold down the Zoom and minus buttons together for 3 seconds or so to exit the Custom Settings menu.

Next press Mode to highlight the Channel setting on the flash and then +/- until it reads Channel 3 ... press Mode to highlight the Group setting and then +/- until it reads Group A. Raise the camera's built-in speedlight and test fire the camera. It should now trigger the flash even though the flash is not connected to the camera. In fact, it triggers the flash with an output level equivalent to the output setting you set on the camera ... Commander Mode/Manual/1/16th power.

Now, when you are setting up your shots for Strobist Lighting102 you can start with ...
  1. Set your shutter speed to 1/125th (or your choice of the other appropriate sync settings)
  2. Take a reading of ambient light (with the camera meter, of course)
  3. Set the aperture to underexpose 2 stops less than the ambient light reading
  4. Take a test shot (camera telling the flash to fire at 1/16th power)
  5. Adjust flash output using Commander Mode/Manual/power level until the exposure is correct
So that's it ... that's where we begin. That is officially our baseline for off-camera flash using a Nikon D70s and an SB600 Speedlight.

We'll keep it simple for now. For future posts we'll cover the setup for using two flash units with the D70s and then another post for using two flash units and controlling their output independently of the camera.

i shoot nikon

6.14.2007

Strobist Translated ... I hope.


We're on the verge of getting our first assignment in Strobist's summer boot camp Lighting 102. On that note, my goal is take part in each assignment and blog my experience. However, the equipment I'll be using will be different. So I want to translate what Strobist does to the language of Nikon's CLS (Creative Lighting System) equipment.

In other words, I'll be demonstrating how to capture the same concepts only using a D70s, an SB800, an SB600 and probably an SU800, wirelessly and in manual mode. Throw in a couple of stands, maybe an umbrella ... a DIY diffusion device ... who knows what else?

I've messed around with some of the things Strobist imparts but, have never spent the time really focusing on the execution and digging for the results. So I'm looking forward to a summer of learning ... and possibly helping others who may be struggling with techniques applied to Nikon equipment.

Happy lighting!

i shoot nikon

6.09.2007

Rain on the plain ...

Well ... there hasn't been too much to do since I committed myself to twiddling my thumbs until Strobist Lighting 102 really kicks in. It actually started five days ago with the first posting: Strobist: L102: Light Controls Overview. This is gonna be great.

Until then, here's a little shoot I did on Thursday. It was graduation night at AHS a school that, by stupidity, flagrant disregard for human life ... er ... tradition, holds its graduation ceremony outside behind the school. Now this wouldn't normally be a concern if Minnesota was known for its incessantly consistent and pristine weather patterns. But, alas, it is not. This time of year offers a complete minestrone of climes never accurately predicted and always leaving one anxious and languished over the outcome.

None-the-less, we're having graduation with the potential of tornadoes and golf-ball sized hail. See?
We're in for a latter day Woodstock. Except the headliners are droning school admins and student honorees. On the bright side, we have a lot more places to take a piss in private.
The festivities were interrupted for about 20 minutes with some good soaking rain and 35 mph winds ... no hail or tornadoes.

So, we started with the processional a little late ... which played into our advantage as the School Principal cut a choral number and an orchestra number to keep us on track (can make it home in time to catch a rerun of Shark).

I got some nice pictures of the graduate and the family but, won't bore you with them here. Here are a couple of shots reaped from the event that I was pleased with.

I was shooting with my D70s fitted with my 28-105mm. My SB-800 fitted to the shoe set to TTL BL. There was still a good amount of ambient light to shoot with and the flash helped bolster ill-cast shadows even at 30 feet away. When I had time, I used Manual exposure mode otherwise shot in Aperture mode set at f/8.0. Seemed to work well with the distance from the subject.

i shoot nikon

5.31.2007

Exposure: Don't be a DFU.

I've read a lot of posts ... users exclaiming the exposure is off by a couple of stops on a lot of new or newer DSLR cameras. Well ... I'm not buyin' it!!!

The civilized world successfully conquered the principles of automated production well over a hundred years ago! And have spent the time since perfecting manufacturing quality and consistency. You can't tell me that the great many users experiencing variations in the manufacture of their DSLR's accurately represents the reliability of today's manufacturing process. There has to be something wrong with the user. Stand up, shake it off crybabies! Take responsibility for your craft! Stop blaming the equipment!!!

Instead ... start to understand the source of your own misconceptions ... do the math.

Just in manual mode alone ...


Shutter from 1' to 1/8000 - 1/3 stop increments = 42 possible settings
Aperture from f/3.5 - f/32 - 1/3 stop increments = 24 possible settings
Metering - 3D Matrix, Center Weighted, Spot = 3 possible settings
Format - JPEG (B,N,F) or NEF(RAW) or both = 5 possible settings
ISO - 200 to 1600 = 10 possible settings on a D70s

That, my friends means for every single exposure you make you have to decide which of the 151,200 possible settings works best for your shot! And that doesn't count all the other variations possible when you start using the camera settings to process jpegs! Sharpening, contrast, color reproduction, saturation, and hue (just to name a few) pushing the possibilities staggeringly over half-a-million choices!

You have to develop a working knowledge about exposure that allows you to quickly narrow your choices and zoom into the one ... I repeat ... the "one" that is the best for your shot. Here's my advice ...

Keep it as simple as possible. Set everything to default. Pick one format (I use NEF(RAW) and Adobe Lightroom for processing), use manual mode and learn about exposure. If you have already learned about exposure ... re-learn it! And most of all ... use your camera a lot and use it consciously - before and after image capture!

If all you want to do is plug your DSLR into a printer and get a bunch of 4x6 prints ... you bought way too much camera.

One of the better books I've read about exposure is Bryan Peterson's treatise entitled: Understanding Exposure: How to Shoot Great Photographs with a Film or Digital Camera. This book was originally released in 1990 and updated to its present 3rd edition supporting the growing nation of digital photographers.

Most of what he writes covers exactly the same thing you may have read about in innumerable printings before his. Smaller opening equals more DOF (depth of field), stop action with faster shutter speed ... blah blah blah. But he frames his teaching in very simple, practical terms that are easy to relate to and apply when shooting.

For example, he divides apertures into three groups: Story telling, who cares, and singular isolation.


  • Story Telling: Great depth of field where the foreground and background work together to capture the story ... both subject and environment are important to the image (f/16 and up).


  • Who Cares: Essentially, images where depth of field is of little concern ... subject up against a building or backdrop. Somewhere in the f/8 - f/11 range where the lens is sharpest.


  • Singular Isolation: You need just the subject ... no distractions from the surroundings. The closer to the subject the larger the aperture opening (f/2.8 to f/5.6) keeping the background out of focus.


These are principles that are quickly learned and applied out in the field. It can take a while to get them into practice but well worth the time and attention.

He also describes some very helpful techniques that are almost always available to you even when you don't have your camera! My personal favorites being Mr. Green Jeans and the Sky Brothers. I don't wanna spoil the ending but instead tell you that his approach is easy to understand, easy to remember, worth practicing and quick to success.

Others of you may have similar recommendations and are welcome to comment enlightening the rest of us.

Note: for the uninitiated ... DFU is programmer and help-desk speak for dumb fucking user.

i shoot nikon

5.27.2007

Nikon D70s an SB800 & SB600

I've seen a lot of posts in the forums, D70 owners asking about the capabilities of this equipment trio.

Here's what I know ... since I have all three and have played around with them for a couple of months now.

Both Flashes Off-camera using TTL


Set the D70/s to Commander mode (Custom Setting 19) which allows the camera to communicate with the flash units on Channel 3 Group A. This is the only Channel/Group option on the D70/s.

Set each flash to remote mode. On the SB800 press select for 3 seconds to access the custom options menu. Navigate to the wireless submenu and press select. Press + or - until Remote is highlighted and press Select. Press select for 3 seconds to exit the custom options menu. Press Select to navigate from channels to groups setting Channel 3 and Group A. On the SB600, press and hold the Zoom and - buttons for 3 seconds to access the custom settings menu. Press + or - to navigate to the wireless option. Press Mode to switch it on. Press and hold Zoom and - for 3 seconds to exit the custom options menu.

The camera has two more settings for controlling the flash units off-camera. Manual and AA (Auto Aperture). Auto Aperture can only be use with a CPU lens and an SB800. Manual mode in this setup can control the output level of the flash units simultaneously. In other words, setting the D70/s flash mode to Commander and selecting Manual submenu allows you to set the flash output to full and down to 1/128th power. Both flashes will output the fraction that the camera is set to.
This is a nice easy setup for wireless flash with Nikon equipment. Fairly flexible and will give you a lot of options albeit limited to equally distributed flash output.

With the SB800 on-camera


The SB800 mounted on the camera opens up a lot of other control features to the camera allowing you to configure the flash contribution of each flash separately. I assume that the same features and controls are available on the SU-800 flash controller except there's no flash gun.
So, the SB800 can control the SB600 setting its output level and setting its own level independently. You can choose whether the SB800 contributes to the exposure or not by setting its contribution level.

This is another great setup stepping up from the previous one in that it gives you the freedom to set flash output individually. However, there's still one flash on your camera. To achieve fuller freedom you'll have to look at working with 2 or more SB800's.


Here's an image I shot with the SB800 camera-left in an umbrella and the SB600 camera-right with a diffuser for the background.

Hopefully, this will help others decide what type of equipment to purchase for the setups they intend to employ. Overall, I'd have to say the SB600 is a great little flash and makes a great companion for the D70/s but, has its limitations when used off-camera. The SB800 is definitely a step up but, then demonstrates the camera's limitation in a wireless system. The only way to gain full flexibility with the camera is using either an SB800 on-camera or an SU-800 controller on-camera with another SB800. At least that would be in the Nikon world of wireless flash technology.

i shoot nikon

5.25.2007

Strobist Lighting 102

Well ... i may not have many readers (if any) at this point but, I believe in supporting my neighbors if not the photography community ... so, get out to take a look at Strobist. It's a great blog about lighting using off camera flash setups ... cheap off camera flash setups. The Strobist motto: LESS GEAR • MORE BRAIN • BETTER LIGHT. I've learned a lot and definitely appreciate what David has been doing. Strobist is a daily read.


Anyway ... more importantly, Strobist is conducting its second summer boot camp, Lighting 102, starting June 4th. Photographers from all over the civilized world will be participating and contributing. It's very exciting.

Strobist summer boot camp, Lighting 102, Check it out! Call collect! Call direct! But, call today!

i shoot nikon

5.22.2007

Macro Afternoon

Today was perfect. Nobody home. High, even cloud cover. Flowers in bloom all over the garden. Time for a little macro photography. Macro photography always amazes me whenever I look at someone else's work but, rarely sparks any true inspiration in me. It's more of a curiosity ... a passing fancy ... a great way to while away the afternoon.

The nicest thing about this opportunity is that I can take some time with the subject. Think about the shot. Play with the exposure. I don't have to worry about fleeting moments or shifting light. It's strictly for me and the subject ... as long as necessary.


  • Equipment:

  • Nikon D70s

  • Nikkor AF 28-105mm f/3.5 - 4.5 D

  • Bogen Manfrotto 3001N Tripod

  • Bogen Manfrotto 3030 Head


The Nikkor AF 28-105mm f/3.5 - 4.5 D lens has a macro setting that I've found I'm fond of in this kind of setting. Usually, I'm far too impatient and forego the macro setting when it's hand-held. This has been a very good lens over the years, a little slow focusing and aperture but, then again, I'm not shooting for Sports Illustrated.

  • Camera Settings:

  • Focus: manual

  • Exposure Mode: manual

  • Meter: 3D Color Matrix

  • ISO: 200

  • Exposure Compensation: none


I need to digress for a minute and address a workflow issue that has been on my mind for a little while. I often exclude the practice of a pre-shoot routine when considering my workflow. That's a bad thing. I realize just how important it is but, it's really changed since I stopped shooting film.

Old way ... figure out what I'm going to shoot, go to my stash or purchase the film needed, make sure everything is in working order, put together my set up, load the camera and start shooting.

Here's the big change. When I would go to my stash of film I was making conscious decisions concerning the ASA/ISO as well as the White Balance (what filters might I need). Pop the film in the camera which sets the ISO automatically and then, the difference between natural and incandescent light was generally understood if not strictly paid attention.

Now ... I need to be aware that ISO and white balance are within my control and I'm responsible to make more than a decision about them. I have to set them myself! This is the part I need to rework into my pre-shoot workflow. Luckily, for this shoot, I had left my white balance set to "Cloudy" from a previous shoot but, don't always check it. I did remember to set the ISO so, I am making some progress. In case you're curious we'll talk more specifically about what I'm discovering of white balance in a later post.

Sample of the Afternoon Fruits


  • Exposure: 1/30 sec @ f/16

  • Focal Length: 105mm

  • ISO: 200


  • Exposure: 1/6 sec @ f/13

  • Focal Length: 105mm

  • ISO: 200


  • Exposure: 1/15 sec @ f/11

  • Focal Length: 90mm

  • ISO: 200


  • Exposure: 1/25 sec @ f/6.3

  • Focal Length: 90mm

  • ISO: 200


All the images I shot were in RAW format and none received any post-capture processing beyond cropping, Lightroom's interpretation of NEF and Lightroom's JPG rendering engine. Note: Nikon's version of RAW is NEF (Nikon Electronic Image Format).


i shoot nikon

5.18.2007

Image Doctors Top Ten Eleven

For those of you who do not have connections with other Nikon shooters, there is a great community available on the web at Nikonians.org. One of the features I particularly enjoy is their bi-weekly podcast cast of the Image Doctors. Photographers Jason Odell and Rick Walker, ala CarTalk (without all the obnoxiousness that is charmingly CarTalk), chat about a lot of different topics involving photography ... specifically Nikon photography.

I was listening to episode #37 a few weeks back in which they presented their top ten photo tips which, in usual Image Doctor style, turned out to be eleven tips ... one louder. I thought that these tips offer good sense and wanted to share them. They explain that this list is prioritized from most important however, I'm not sure that you should prioritize this list. I think it could be delivered in any order without impugning the integrity of any one tip. Anyway ... here it is, enjoy!


1. Get a tripod ... use it!

You don't have to go out and buy a $500 Gitzo Carbon blah blah blah. Get something that can hold your camera equipment without flexing and that you will use. If you don't think your lenses are sharp enough, use a tripod. Your images will be much sharper!

2. Get to know your flash? ... use it!

You will get better quality images where ambient light just won't cut it. Get a flash, learn to use it and consider using it more often. For instruction on how to use it off-camera see Strobist

3. Learn the basics of exposure.

Learn the effects of shutter speed and aperture. Take your camera out of Program mode and use it in Aperture Priority, Shutter Priority or better yet, Manual mode. You want to be making the decisions about how your images look not letting the camera make those decisions. Otherwise, your images will all look alike ... almost if made by a computer! doh! they are!

4. Bump up the ISO setting

You may think, "but my images will be full of noise!!!" ... well, that's true to a certain extent but a lot of that can be cured if you stop looking at your images zoomed into 100% on a 72 dpi computer screen. Which leads us to ...

5. Make some prints

A monitor is not necessarily the most useful tool on which to view a digital photograph. Viewing a photo at 100% on a computer screen is like looking at slide film using 50x magnification. Nobody ever does that. Your average loupe is only like 8x. Make some prints (or get some prints made) and let that be the judge of your photo's quality.

6. Learn to recognize good and bad light

Think about it consciously. Wait for good light or know how to handle poor light situations. If you recognize that the light is less than ideal, bring supplemental light and know how to use it.

7. Learn the Rule of Thirds

Don't "bulls-eye" your subject. The frame should be divided in three horizontally and vertically. Where the grid lines cross are the references where eyes, horizons, faces should appear in the image. Here's is a nice little reference on Wikipedia

8. Learn how to use the Levels function

The levels feature in whatever post-processing software you're using can have a profound impact on your images. Determine what is white, determine what is black and adjust the overall brightness. This can turn seemingly flat photos into crisp, deep images.

9. Get closer to your subject

Get in tighter and make your subject fill the frame. Pay attention to extraneous distractions in outside areas of the composition. Get in close ... you want to see faces. A good rule of thumb is: frame the picture the way you think it should be then, take one step closer.

10. Persevere ... don't be lazy

Getting good pictures takes perseverance. Do your homework before you shoot. Wait for the right light, compose with the camera away from your eye. Work at your craft it will payoff many time over.

11. Don't blame your equipment

If you're not getting the results that you like, don't assume that it's your camera. First, assume that you're not using it correctly. The reason why National Geographic gets the shots they do is because those guys know what they're doing with their equipment. They work hard to know their equipment before they take them on a shoot. Spend a lot of time with your camera ... experiment ... play ... take notes ... blog.


I thought those were very insightful if not just plain common sense, and hope that you find them useful. One of the things that I've been working on is using the camera in manual mode. Pick a subject that will let you think before you have to trip the shutter and experiment with the effects of aperture versus shutter speed.

One of my favorite resources for exposure is Bryan Peterson's book Understanding Exposure: How to Shoot Great Photographs with a Film or Digital Camera. It's really a nice, up-to-date reference that really explores the principles of aperture, shutter speed, light, motion ... as well as give you some reference points that you always have with you. Check it out at Amazon here and check out his website here.

i shoot nikon

5.14.2007

Friday Night Lights


This weekend was senior prom weekend and having family of graduating age I was afforded the opportunity to shoot four couples as they prepared for their evening of emancipation, debauchery and erotica (oh, don't they wish!). Anyway ... there were parents and point-and-shoots everywhere all wondering who the "serious" guy was with all the camera gear!?! Although, there was some kid there, I assumed he was a family member of whosever house we were at, that was using a high-end consumer, digital video camera ... perhaps a Canon GL1 or something.


Anyway, I was just using my D70s fit with the Nikkor 18-70mm AF-S DX Zoom f/3.5-4.5G IF-ED. I chose that lens because I knew I'd have a chance to work in pretty close and 70mm works pretty nicely for portraits and the 18mm could give me plenty of vista doing candids of eight highschool kids. On the camera was an SB-800 Speedlight (What a nice piece of flash equipment! If you don't have one, get one).


Settings:


  • Matrix Metering

  • Aperature Priority

  • ISO 200

  • White Balance: Flash

  • TTL BL (Balanced Flash Fill)


I set the aperture at the widest possible (depending on the zoom length) to keep the background as out of focus as possible ... I really need to get that f/2.8 glass sometime. I think I rode f/4.0 throughout the shoot. The time of day was nice. We were shooting between 5 and 6 PM in a nicely shaded backyard that offered ample diffuse light with some nice sun coming through. The only problem was some pretty busy backgrounds.


I played around a little with the difference between TTL and TTL with balanced flash fill (BL). I was getting a lot of burned out highlights with straight TTL ... probably because the flash was pretty harsh. I think that next time I may also try a Stoffen diffuser to knock the harshness down. I find as I look at the shoot that the BL works nicely with the ambient light at a distance of about 2 meters. But, when I backed off I really needed an extra boost of diffuse light in TTL mode and could have added more light with exposure compensation.


Shooting the candids I wanted to be able to act quickly so having the camera in a semi-automatic mode (Aperature Priority) helped support speed but I lost the flexibility of getting more accurate exposures in manual mode. It's all give and take, I guess.


All the images in this post were shot in NEF (Nikon's version of RAW) and had no additional processing beyond exporting them to JPEG's.


Gotta go burn some CD's for the parents ...


i shoot nikon

5.12.2007

Okay Sport! Let's shoot some photos

I've been doing a lot of sports photography lately. My step-daughter plays on the high school's girls lacrosse team. I don't have any particular obligation to shoot the games except it presents a great opportunity to hone my skills and become closer friends with my camera.


Shoots and scores!

The biggest payoff is it has forced me to do two things: 1) press the shutter a lot and 2) process a lot of images.


Pressing the shutter a lot is a new concept. This is where new found freedom comes in. I have a couple of 2 gig cards and the luxury of not having to worry about how many shots I have left is quite liberating. I shoot RAW ... which is a topic for another post but, I get 358 images on one card. I have never filled a card and usually get around 100 shots per game. This would be the equivalent of 4 rolls and $100 worth of film and processing! To date I've shot and processed enough to pay for my camera and it's only 6 months old!


But I digress ...


What I want to talk about is the processing part. I've really been forced to look at and develop some kind of workflow to handle all the images. I've mentioned before that I've been using Adobe® Lightroom™. But, before I could I needed to make some sense about the generic principals of workflow. So let's talk about the post-capture process for a minute or two.


I bolstered my computer with a new 250 gig hard drive that I use strictly for data storage (image files). Before I insert my card into the USB card reader I create a folder on the hard drive using the following naming convention: YYYYMMDD.maintopic.subtopic ... EXAMPLE: 20070510.Lacrosse.Opponent. Then, I open that folder. When I insert my card into the card reader a dialog pops up and I select Open Folder to View Files. CTRL-A selects all the files, right-click drag to 20070510.Lacrosse.Opponent, select Move and all the files are moved from my card to the folder on my hard drive.


Then the processing begins in the following manner:


  1. View images and delete the obvious clunkers

  2. Review what's left checking for focus and content: flag the rejects

  3. Delete rejects

  4. Review what's left flagging images worth further processing

  5. Ignore unflagged images

  6. Rename image files

  7. Put folder on the docket for backup


Now ... if you're looking at a file folder full of images and wondering, "flag? what's a flag? how do I flag?" then, you're in the right frame of mind. For me, this is where Lightroom™ comes in. For others, it may be where Nikon Capture®, Adobe Bridge®, Apple Aperature™ or any of a number of other software applications too numerous to mention comes in. They should all have some kind of flagging function that can be put to use in this fashion.


If you don't have any software for these basic tasks at least check out Discover digital imaging with Windows XP at Microsoft.com, there is also Nikon Picture Project available for download at NikonUSA.com (if you have a Nikon DSLR it's probably still with all the other stuff that came in the box) or look at other Microsoft resources at Microsoft Digital Image Suite. These shouldn't stretch your budget too much if any otherwise, at the time of this writing Lightroom is selling for $299, Nikon Capture $130, Apple Aperature $299. I'm sure that other readers can make suitable recommendations of other software deserving attention.


So ... get yourself started with some basic organization and I'll talk more later about Lightroom and what it has helped me with. I'm also in the middle of a review of Scott Kelby's book Lightroom for Digital Photographers. I think you'll find it enlightening.


i shoot nikon

5.10.2007

How i got d igit all ...

I started taking photographs when I was pretty young. My uncle is a professional photo-essayist. And whenever he would come to visit he would pull from his belongings a shiny metal attaché case which, when opened, showed off the coolest looking cameras and lenses. Nikon, they said on the front. I'd watch as he thoughtfully and purposefully selected a lens mounting it on a camera with "F" emblazoned on it. Just above the Nikon logotype ... nothing else, just "F." Keschunk! It was beautiful! He showed me how to hold it, how to focus and how to release the shutter ... 1/30th of a second! What a great sound! Then the film advance …

By the time I was ten, he had shown me how to develop my own B&W film and make contact prints. I was using a camera that my mom had lying around. It was an old Kodak something with a bellows that folded out from a front closure and it used 620 B&W roll film so, the negatives were pretty big. I had a little darkroom tucked under the basement stairs where they might have stored coal or something back pre-gas furnaces days. I could develop film and make contact prints about 3x4.

By the time I had reached high school, dad let me use his SLR a Canon FT QL … in fact, he just gave it back to me a few months ago. It’s been about 30 years but it still felt potent in my hands. I was a photographer for the school paper and year book and his letting me use the Canon was the perfect way to keep me out of major trouble. It also meant I had unlimited access to enlargers, chemicals, film, and the school darkroom! It had to be the most expensive three years in all the school district history. My buddy and I took thousands of photographs! I still have some of the B&W prints.

Right after high school I bought my first Nikon … well … Nikon made, anyway. It was a brand new Nikkormat Ftn (discontinued a year later). It was a great camera … not a Nikon but, so much closer than anything else I’d had. I say it “was” a great camera because it was stolen from me while on a trip to Denver with a couple of buddies. It was sad because it happened the first full day in our nine-day trip which included stops in LA, Santa Barbera and San Francisco. I was crushed. We stayed with a friend of ours in San Francisco that lent me his SLR for the last three days of the trip … so, photos exist, they just don’t cover the entire whirlwind.

When I got back, insurance money helped purchase my first Nikon … a used F Photomic Tn. I had it. The keschunk! Twist the f/stop ring to register the widest opening! The shutter release … 1/30th of a second! What a great sound! I used that camera for almost twenty years. It even got stolen from my apartment and recovered when a pawn shop reported it had received it.

But times change and I thought I needed something more … automatic … something more … updated. Around 1997 I started shooting an N90s that I bought used from a local dealer. This camera was sooooo cool because I didn’t have to shell out the extra bucks for a motor-drive! It was built right in! I could blast off 6 fps. Thirty-six shots in just over 6 seconds! This was the coolest. And I could hook it up to my computer and get all sorts of info about every shot! And it still sounded like a Nikon and it was all black and had a command wheel and programmed presets and would read the ASA right off the side of the film canister! And it ran on four AA batteries … forever!

Then, it hit me ... like a hot kiss at the end of a wet fist. Computer ... camera ... computer ... camera. Why am I spending so much money on film and processing!?! Why do I have to wait to find out that I have a bunch of crap on a roll that I just spent $20 on!?! Why don't I sell my darkroom stuff and beef up my computer, sell the N90s and go digital!?! It seemed as right as rain. Natural. Almost biological, slap-myself-in-the-forehead-duh-obvious!

So ... I've been shooting Nikon for a long time and now image making is all digital. I can put a 2gig card in the camera and take 358 RAW images before having to change the card! Then, I can transfer them to my computer and ... well ... uh ... I'm not sure. So many questions arise: white balance, RAW, JPG, exposure, color space, workflow, processing, organization, storage, batteries, printing, publishing, sharing, Photoshop®, etcetera, etcetera, etcetera.

The answer was ... start blogging ... someone must care.

i shoot nikon

5.09.2007

Here's what I want to do

I've been taking photographs for a long time ... and have recently been re-energized by the purchase of a digital SLR. In other words, I'm no longer shackled by film cost and processing. However, I am now responsible for what I've been paying others to do for me ... process and make my photographs look good. And there's a lot to learn in order to capitalize on my new found freedoms responsibilities.

It's here that I hope to document and share my experiences with the new medium in hopes that others may relate, respond and/or be enlightened ... as well as teach me and is hootnik on readers. I plan to post articles about my workflow as it develops, software and equipment I use, new techniques I've learned, compositions, subjects, issues, problems and solutions. Somethings may be common, some rare, or even slap-yourself-in-the-forehead-duh-obvious. Why ... I may just take the time to spout off a little.

I shoot with a Nikon D70s and have two lenses: 18-70mm AF ED and a 28-105mm AF ED. These are augmented by an SB-800, an SB-600, Manfrotto tripod, a light stand, a couple of umbrellas and miscellaneous supporting gadgets, widgets, clamps, reflectors diffusers, and stuff. I've recently started using Adobe® Lightroom™. I use Photoshop® and know how to program for the web (at least that's what they pay me to do at work).

So ... essentially, the D70s is the Nikon connection. I hope that the information found here can at least be philosophically generic yet technical explorations will be centered on Nikon DSLR's, specifically the D70s until I upgrade or migrate to the Dark Side. At which time I'll change the title of the blog to "is hootcan on."

Also ... workflow will center around the use of Adobe® Lightroom™ although, most image management/processing software principally offers similar features with familiar goals. After all, we're just a bunch of photogs essentially doing the same thing ... capture, organize, process, publish.

I'm not too sure just how often I'll be inspired to put up new postings but, I'm impressed with a number of blogs I read and perhaps could live up to their inspiration. Anyway ... I'll at least have some fun and maybe someone will pay attention or show interest.

So ... here's to is hootnik on.
i shoot nikon