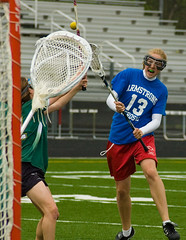
Okay Sport! Let's shoot some photos
I've been doing a lot of sports photography lately. My step-daughter plays on the high school's girls lacrosse team. I don't have any particular obligation to shoot the games except it presents a great opportunity to hone my skills and become closer friends with my camera.

The biggest payoff is it has forced me to do two things: 1) press the shutter a lot and 2) process a lot of images.
Pressing the shutter a lot is a new concept. This is where new found freedom comes in. I have a couple of 2 gig cards and the luxury of not having to worry about how many shots I have left is quite liberating. I shoot RAW ... which is a topic for another post but, I get 358 images on one card. I have never filled a card and usually get around 100 shots per game. This would be the equivalent of 4 rolls and $100 worth of film and processing! To date I've shot and processed enough to pay for my camera and it's only 6 months old!
But I digress ...
What I want to talk about is the processing part. I've really been forced to look at and develop some kind of workflow to handle all the images. I've mentioned before that I've been using Adobe® Lightroom™. But, before I could I needed to make some sense about the generic principals of workflow. So let's talk about the post-capture process for a minute or two.
I bolstered my computer with a new 250 gig hard drive that I use strictly for data storage (image files). Before I insert my card into the USB card reader I create a folder on the hard drive using the following naming convention: YYYYMMDD.maintopic.subtopic ... EXAMPLE: 20070510.Lacrosse.Opponent. Then, I open that folder. When I insert my card into the card reader a dialog pops up and I select Open Folder to View Files. CTRL-A selects all the files, right-click drag to 20070510.Lacrosse.Opponent, select Move and all the files are moved from my card to the folder on my hard drive.
Then the processing begins in the following manner:
- View images and delete the obvious clunkers
- Review what's left checking for focus and content: flag the rejects
- Delete rejects
- Review what's left flagging images worth further processing
- Ignore unflagged images
- Rename image files
- Put folder on the docket for backup
Now ... if you're looking at a file folder full of images and wondering, "flag? what's a flag? how do I flag?" then, you're in the right frame of mind. For me, this is where Lightroom™ comes in. For others, it may be where Nikon Capture®, Adobe Bridge®, Apple Aperature™ or any of a number of other software applications too numerous to mention comes in. They should all have some kind of flagging function that can be put to use in this fashion.
If you don't have any software for these basic tasks at least check out Discover digital imaging with Windows XP at Microsoft.com, there is also Nikon Picture Project available for download at NikonUSA.com (if you have a Nikon DSLR it's probably still with all the other stuff that came in the box) or look at other Microsoft resources at Microsoft Digital Image Suite. These shouldn't stretch your budget too much if any otherwise, at the time of this writing Lightroom is selling for $299, Nikon Capture $130, Apple Aperature $299. I'm sure that other readers can make suitable recommendations of other software deserving attention.
So ... get yourself started with some basic organization and I'll talk more later about Lightroom and what it has helped me with. I'm also in the middle of a review of Scott Kelby's book Lightroom for Digital Photographers. I think you'll find it enlightening.
i shoot nikon


No comments:
Post a Comment